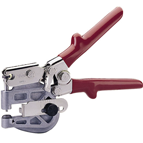
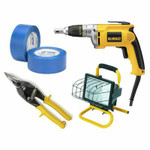
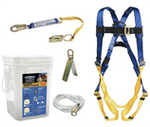
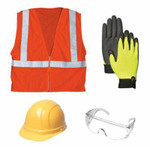
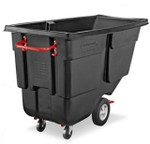
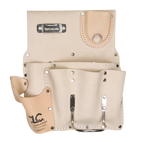
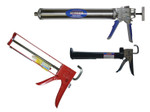
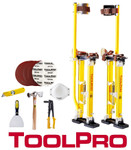
Drywall Tools
Drywall Tools
Drywall Tools

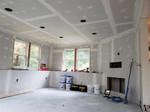
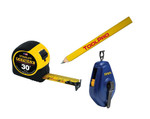
Drywall tools are essential for professionals in the interior construction and renovation industry. Whether you're hanging, finishing, or repairing drywall, having the right tools can make all the difference in achieving a smooth and professional-looking finish. These specialized tools are designed to streamline the process, enhance efficiency, and ensure precision in every step of working with drywall.

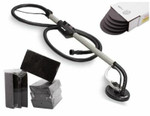
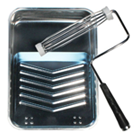
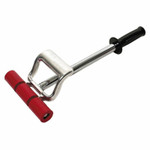
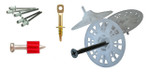
From cutting and shaping to taping and sanding, there is a wide array of drywall tools available to suit different tasks and skill levels. These tools not only facilitate the installation and finishing of drywall but also help in achieving seamless joints, smooth surfaces, and sturdy constructions.

ToolPro is a name you can trust in selecting your tools and supplies for drywall work and all other types of interior construction.

Drywall construction involves several steps, from measuring and cutting to finishing, each requiring specific tools and techniques for efficiency and quality results.

Tools for Drywall Construction

  1. Measuring and Cutting Tools:

    • Tape Measure: Essential for measuring drywall sheets to fit the space accurately. A 25-foot long tape measure is recommended for measuring larger walls​​.
    • Utility Knife: Used for cutting drywall sheets. It's efficient for making precise cuts and can be used to score the drywall before snapping it along the scored line​.
    • T-Square: Assists in making straight cuts across drywall sheets, ensuring they are perpendicular to the edges​.
    • Drywall Saw: Ideal for cutting holes and openings in drywall, especially for fixtures like electrical outlets​​.
    • Drywall Router: An upgrade from the traditional drywall saw, it cuts faster with less effort and is particularly useful for cutting out electrical, window and door openings​​.
  2. Hanging Tools:

    •  
    • Drywall Screws and Screw Gun: Screws provide a stronger hold than nails, and a screw gun speeds up the process of securing drywall to studs​​.
    • Roll Lifter: Holds the bottom sheet tight to the one above to ensure a close joint.
  3. Taping and Mudding Tools:

    • Drywall Taping Knife: Used for applying joint compound over seams and corners, ensuring a smooth, even application​​.
    • Mud Pan: Holds the joint compound, making it easier to apply without going back and forth to a larger container​.
    • Joint Tape: Reinforces the seams between drywall sheets, preventing cracks from forming over time​.
    • Corner Tools: Specifically designed for applying mud to inside and outside corners for a neat finish​​.
  4. Finishing and Sanding Tools:

    • Sanding Sponge and Pole Sander: Used for smoothing out the joint compound after it dries, preparing the surface for painting​.

Modern Techniques and Materials

  • Polyurethane-based Spray Foam Adhesives: Offer a stronger hold with fewer screws needed, speeding up the hanging process and reducing the chance of screw pops​​.
  • Staggered Seams: Staggered seams are always desireable.  Some people suggest that staggering drywall joints is often unnecessary, with techniques available to make butt joints nearly invisible​​.

This overview highlights the essential tools and some modern methods in drywall construction, aimed at achieving a seamless and durable finish. The actual process might involve additional steps and tools, depending on the specifics of the project and the finishes desired.

Suspended Ceiling
Suspended Ceiling
Suspended Ceiling

The installation of a drop ceiling, also known as a suspended ceiling, transforms any room into a space of efficiency and aesthetic appeal, offering both functionality and style. This popular ceiling solution is widely used in commercial and residential settings alike, providing easy access to ductwork, wiring, and plumbing hidden above, while also enhancing sound dampening and energy efficiency. To ensure a proper installation that meets both aesthetic and functional standards, it’s essential to be equipped with the right tools and supplies—a checklist that every professional and DIY enthusiast should be familiar with.

Starting with the basics, a drop ceiling project requires a durable ceiling grid system, which typically includes main runners, cross tees, and wall angles. These components form the skeleton of the ceiling, onto which ceiling tiles or panels are placed. The choice of tiles can vary widely, from classic acoustic panels for soundproofing to innovative translucent or patterned tiles for added visual impact.

Key tools for the job include a laser level for ensuring a perfectly flat ceiling plane, a chalk line for marking reference lines on walls, tin snips for cutting metal components to size, and a rivet gun for securely joining metal parts. Additionally, a utility knife is indispensable for trimming ceiling tiles to fit irregularly shaped perimeter spaces.

For the installation process itself, various fasteners and hardware such as wire, eye lag screws for wood joists or concrete anchors for masonry, and S-hooks or clips for attaching the grid to the support wires are essential. The choice of these supplies will depend on the specific building materials and structure of the installation site.

Beyond the physical tools and supplies, a successful drop ceiling installation also relies on meticulous planning and preparation. This includes accurate room measurements to calculate the amount of materials needed and an understanding of the building codes and standards that apply to suspended ceiling installations.

In summary, the proper installation of a drop ceiling is a detailed process that requires a specific set of tools and supplies. From the ceiling grid and tiles to the precision tools for installation, each component plays a crucial role in achieving a professional-looking and functional ceiling. With the right preparation and materials, adding a drop ceiling to your space can be a rewarding project that enhances both the appearance and utility of any room.

Power Tools
Power Tools
Power Tools

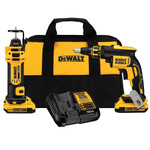
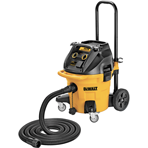
Power Tools For Constructing Interior Walls and Ceilings

  • Cordless Drills and Impact Drivers: Vital for fastening and assembling stud frames, with drill bits and driver sets tailored for different materials and fastener types.
  • Circular Saws: Used with blades designed for cutting through framing lumber, these ensure quick and accurate cuts for both studs and ceiling joists.
  • Miter Saws: Equipped with fine-toothed blades, perfect for making precise angle cuts necessary in framing work for a seamless fit.
  • Reciprocating Saws: With various blade options for cutting through wood or metal, these are indispensable for modifying framing or cutting openings.
  • Laser Levels: Project perfectly level lines across walls and floors to guide the installation of ceiling grid systems, ensuring a uniform and straight drop ceiling.
  • Drywall Screw Guns: Specifically designed for drywall installation, these guns feature auto-feed systems and depth settings to ensure screws are perfectly countersunk without damaging the drywall surface.
  • Drywall Cutout Tools and Routers: Rotary tools that utilize specialized bits for making precise cutouts for electrical boxes, vents, and other fixtures in the drywall.
  • Sanding Tools: Power sanders, equipped with dust collection systems and various grit sanding pads, are used to smooth the joint compound on drywall seams and patches.

Power tools and their accessories are the backbone of efficient interior construction work, enabling professionals and DIY enthusiasts to achieve professional-grade results in constructing stud walls, ceilings, and installing drywall and drop ceilings. By choosing the right tools and utilizing them properly, builders can ensure structural integrity, aesthetic appeal, and long-lasting performance in their projects.